

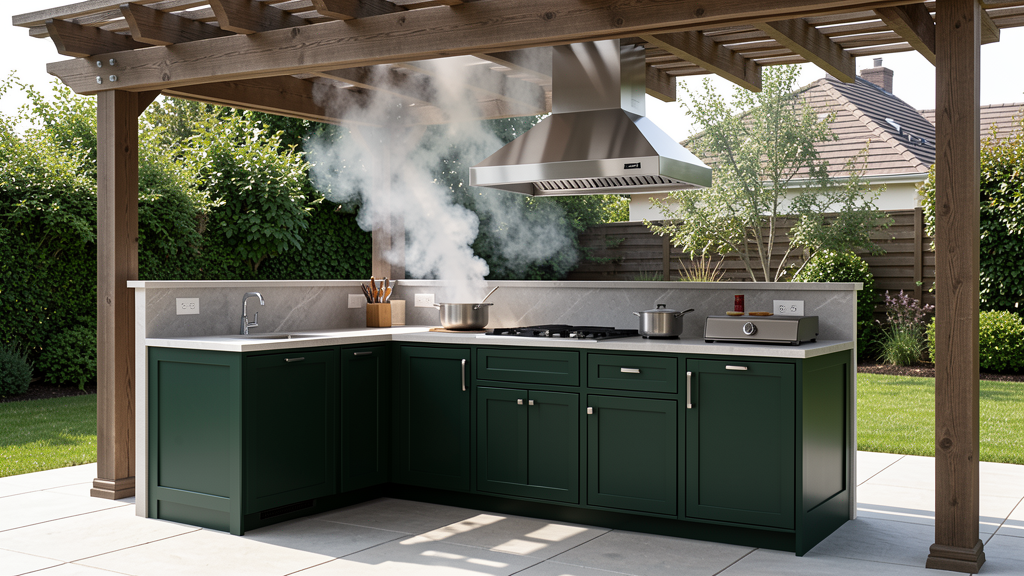
Outdoor Kitchen Ventilation Guide: Range Hoods, Airflow, and Smoke Control
An outdoor kitchen without proper ventilation is a smoky, uncomfortable space that drives guests away and leaves lingering odors in your home. Whether you’re grilling burgers, searing steaks, or stir-frying vegetables, cooking generates smoke, grease, heat, and odors that need to be managed effectively.
This comprehensive guide covers outdoor kitchen ventilation — from range hood selection and placement to airflow design and maintenance — so you can create a comfortable cooking environment that keeps smoke away from your home and guests.
Why Ventilation Matters in Outdoor Kitchens
Problem 1: Smoke Intrusion
What happens:
– Smoke drifts into your home through windows and doors
– Lingering odors in furniture, curtains, and clothing
– Discomfort for guests downwind
Impact:
– Reduced enjoyment of outdoor space
– Potential damage to home interior
– Complaints from neighbors
Problem 2: Grease Accumulation
What happens:
– Grease particles settle on cabinets, furniture, and surfaces
– Sticky residue on pergola beams and ceilings
– Attracts insects and pests
Impact:
– Increased cleaning and maintenance
– Potential damage to finishes
– Unhygienic cooking environment
Problem 3: Heat Buildup
What happens:
– Cooking generates significant heat (grills can reach 500°F+)
– Heat radiates to seating and dining areas
– Discomfort for cooks and guests
Impact:
– Reduced comfort in hot weather
– Potential damage to nearby materials
– Increased cooling costs (if air-conditioned)
Problem 4: Carbon Monoxide and Gas Fumes
What happens:
– Gas grills produce carbon monoxide (CO)
– Inadequate ventilation allows gas accumulation
– Health and safety hazard
Impact:
– Risk of carbon monoxide poisoning
– Potential gas explosion hazard
– Health concerns for cooks
Range Hoods: The Primary Ventilation Solution
What Range Hoods Do
Capture and exhaust:
– Smoke and combustion byproducts
– Grease particles
– Heat
– Odors
– Steam
How they work:
1. Fan creates negative pressure (suction)
2. Air is drawn into hood
3. Grease is filtered (baffle or mesh filter)
4. Exhaust is vented outside (or filtered and recirculated)
Types of Range Hoods
✅ Ducted (Vented) Range Hoods
How they work:
– Capture smoke and exhaust it outside through ductwork
– Most effective at removing contaminants
– Require professional installation
Pros:
– Most effective ventilation
– Removes heat, smoke, and odors completely
– Quieter operation (fan is outside or in duct)
– Better for high-BTU grills
Cons:
– Requires ductwork installation
– More expensive
– Professional installation recommended
– May require structural modifications
Best for:
– High-BTU grills (40,000+ BTU)
– Frequent cooking
– Enclosed or covered outdoor kitchens
– Homes with strict air quality requirements
Budget: $800 – $3,000 (plus installation)
Recommended brands:
– Broan-NuTone Outdoor
– Wolf Outdoor Ventilation
– Viking Professional
✅ Ductless (Recirculating) Range Hoods
How they work:
– Capture air through filters
– Clean air with charcoal filters
– Recirculate filtered air back into space
Pros:
– Easier installation (no ductwork)
– Less expensive
– Flexible placement
– DIY-friendly
Cons:
– Less effective than ducted
– Doesn’t remove heat
– Filters require regular replacement
– Not suitable for high-BTU grills
Best for:
– Low-BTU grills (under 30,000 BTU)
– Occasional cooking
– Open, well-ventilated areas
– Budget-conscious projects
Budget: $400 – $1,200 (plus installation)
Recommended brands:
– Cosmo Under Cabinet
– Broan-NuTone Recirculating
– AKDY Outdoor
✅ Downdraft Ventilation Systems
How they work:
– Installed behind cooktop or in countertop
– Pull smoke and grease downward (instead of upward)
– Exhaust through floor or wall ductwork
Pros:
– Unobstructed view (no overhead hood)
– Effective for island installations
– Sleek, modern appearance
– Good for open-concept designs
Cons:
– Less effective than overhead hoods
– Requires floor or wall ductwork
– More expensive installation
– Limited to specific grill types
Best for:
– Kitchen islands
– Open-concept designs
– Modern aesthetics
– Low-profile installations
Budget: $1,000 – $3,500 (plus installation)
Recommended brands:
– Broan-NuTone Downdraft
– Wolf Downdraft Ventilation
– Zephyr Downdraft
Range Hood Sizing Guide
Rule of thumb:
– Hood should be at least as wide as cooking surface
– Extend 3″ beyond each side of grill
– Mount 24″-30″ above cooking surface
Sizing examples:
– 30″ grill → 36″ hood minimum
– 36″ grill → 42″ hood minimum
– 48″ grill → 54″ hood minimum
CFM (Cubic Feet per Minute) requirements:
– Calculate total BTU of all cooking appliances
– Divide by 100 = minimum CFM required
– Example: 60,000 BTU grill → 600 CFM hood minimum
High-CFM considerations:
– 600+ CFM may require makeup air system
– Check local building codes
– Professional installation recommended
Range Hood Placement
Optimal placement:
– Centered over cooking surface
– 24″-30″ above grill (check manufacturer specs)
– Extend 3″ beyond each side of cooking surface
– Position to capture smoke at source
Avoid:
– Too high (smoke escapes before capture)
– Too low (interferes with cooking, heat damage)
– Off-center (uneven smoke capture)
– Near windows or doors (smoke drawn back in)
Pergola-Integrated Ventilation
Built-In Hood Systems
What they are:
– Range hood integrated into pergola structure
– Ductwork hidden within pergola beams
– Clean, streamlined appearance
Benefits:
– Professional appearance
– Protected from weather
– Efficient smoke capture
– Structural support for heavy hoods
Installation:
– Requires custom pergola design
– Ductwork routed through beams
– Professional installation required
– Coordination between pergola and hood manufacturers
Recommended:
– Cubox OKM Series Pergola with integrated ventilation
– Custom pergola with hood mounting provisions
Budget: $2,000 – $5,000 (included in pergola cost)
Ceiling-Mounted Hoods
What they are:
– Range hood mounted to pergola ceiling or beams
– Standard hood installation
– Visible hood structure
Benefits:
– Effective smoke capture
– Standard installation methods
– Wide selection of hood styles
– Easier maintenance access
Installation:
– Mount to pergola beams or ceiling
– Route ductwork through pergola structure
– Ensure proper clearances
– Professional installation recommended
Budget: $800 – $2,500 (plus installation)
Canopy Hoods
What they are:
– Large hood that extends over entire cooking area
– Commercial-style appearance
– Maximum smoke capture
Benefits:
– Excellent smoke capture
– Covers multiple appliances
– Professional appearance
– Good for high-BTU setups
Cons:
– Large, industrial appearance
– Requires strong structural support
– Expensive
– May block views
Best for:
– Commercial-style outdoor kitchens
– Multiple cooking appliances
– High-BTU grills (60,000+ BTU)
– Serious outdoor cooks
Budget: $1,500 – $4,000 (plus installation)
Alternative Ventilation Strategies
Ceiling Fans
What they do:
– Create air movement
– Disperse smoke and heat
– Improve comfort
Limitations:
– Don’t remove smoke (just move it around)
– Can blow smoke into seating areas
– Not a substitute for range hoods
Best for:
– Supplemental ventilation
– Open, uncovered areas
– Low-smoke cooking
– Comfort cooling
Budget: $200 – $800 (plus installation)
Exhaust Fans
What they do:
– Pull air from space and exhaust outside
– Create negative pressure
– Remove heat and odors
Limitations:
– Don’t capture smoke at source
– Less effective than range hoods
– Can draw smoke from cooking area into space
Best for:
– Enclosed outdoor kitchens
– Supplemental ventilation
– Heat removal
– General air circulation
Budget: $300 – $1,000 (plus installation)
Natural Ventilation
What it is:
– Rely on wind and natural air movement
– No mechanical systems
– Open design promotes airflow
Limitations:
– Unreliable (depends on wind direction)
– Can’t control smoke direction
– Ineffective in calm conditions
– May blow smoke into home
Best for:
– Very open, uncovered areas
– Low-smoke cooking
– Supplemental to mechanical ventilation
– Budget projects
Budget: $0 (design consideration only)
Ventilation Design: Putting It All Together
Step 1: Assess Your Cooking Setup
Consider:
– Type of cooking appliances (grill, burner, wok range)
– Total BTU output
– Cooking frequency and style
– Location (covered, uncovered, enclosed)
Step 2: Calculate CFM Requirements
Formula:
– Total BTU ÷ 100 = minimum CFM
– Example: 60,000 BTU grill + 20,000 BTU side burner = 80,000 BTU total
– 80,000 ÷ 100 = 800 CFM minimum
Adjustments:
– Add 25% for high-altitude installations
– Add 25% for enclosed spaces
– Add 25% for frequent high-heat cooking
Step 3: Select Ventilation System
For high-BTU grills (40,000+ BTU):
– Ducted range hood (600+ CFM)
– Pergola-integrated hood system
– Canopy hood for multiple appliances
For low-BTU grills (under 30,000 BTU):
– Ducted or ductless range hood (300-600 CFM)
– Downdraft system for islands
– Ceiling fan for supplemental ventilation
For open, uncovered areas:
– Ducted range hood
– Ceiling fan for comfort
– Natural ventilation (design consideration)
Step 4: Plan Ductwork
Duct requirements:
– Use smooth-wall metal duct (galvanized steel or aluminum)
– Avoid flexible duct (creates turbulence, reduces efficiency)
– Keep duct runs as short and straight as possible
– Use minimum number of elbows and transitions
– Slope duct slightly toward exterior (prevents condensation)
Duct sizing:
– Match duct size to hood outlet
– Use 6″ minimum for 400-600 CFM
– Use 8″ minimum for 600-1000 CFM
– Use 10″ minimum for 1000+ CFM
Termination:
– Terminate at least 10 feet from windows, doors, or air intakes
– Use weatherproof cap with backdraft damper
– Terminate away from seating areas
– Check local codes for specific requirements
Step 5: Consider Makeup Air
What it is:
– Fresh air introduced to replace exhausted air
– Required for high-CFM systems (600+ CFM)
– Prevents negative pressure in home
Why it matters:
– High-CFM hoods can create negative pressure
– Negative pressure draws exhaust gases back into home
– Can cause backdrafting of water heaters, furnaces
– Reduces hood efficiency
Solutions:
– Motorized makeup air damper
– Dedicated outdoor air system (DOAS)
– Open windows or doors (manual solution)
When required:
– 600+ CFM in enclosed spaces
– 400+ CFM in tightly sealed homes
– Required by building code in many areas
Budget: $500 – $2,000 (plus installation)
Maintenance: Keep Ventilation Working
Monthly Tasks
- Clean hood exterior — wipe down with degreaser
- Inspect filters — check for grease buildup
- Test fan operation — ensure proper suction
- Check for unusual noises — indicates bearing or motor issues
Quarterly Tasks
- Clean or replace filters:
- Baffle filters: Remove and wash in dishwasher or degreaser
- Mesh filters: Replace when damaged or heavily clogged
- Charcoal filters (ductless): Replace every 3-6 months
- Clean duct interior — hire professional for deep cleaning
- Inspect ductwork — check for leaks, damage, or blockages
- Test dampers — ensure they open and close properly
Annual Tasks
- Professional duct cleaning — remove grease buildup
- Inspect fan motor — check bearings and electrical connections
- Clean exterior termination — remove debris, check damper
- Inspect entire system — check for wear, damage, or deterioration
Common Ventilation Problems and Solutions
Problem 1: Smoke Not Being Captured
Possible causes:
– Hood too high above cooking surface
– Insufficient CFM for BTU output
– Wind interference (outdoor conditions)
– Ductwork blockage or restriction
Solutions:
– Lower hood to 24″-30″ above grill
– Upgrade to higher-CFM hood
– Install wind guards or screens
– Clean or replace ductwork
Problem 2: Excessive Noise
Possible causes:
– Undersized ductwork (air moving too fast)
– Poor duct design (too many elbows)
– Fan motor issues (worn bearings)
– Loose components (vibration)
Solutions:
– Increase duct size (reduces air velocity)
– Simplify duct design (fewer elbows)
– Replace fan motor or bearings
– Tighten or secure loose components
Problem 3: Grease Accumulation on Surfaces
Possible causes:
– Inadequate hood coverage
– Missing or damaged filters
– Ductwork leaks
– Insufficient CFM
Solutions:
– Upgrade to larger hood
– Replace or clean filters regularly
– Seal ductwork joints
– Upgrade to higher-CFM hood
Problem 4: Odors Lingering in Home
Possible causes:
– Duct termination too close to windows or doors
– Negative pressure drawing air back in
– Leaky ductwork
– Insufficient ventilation
Solutions:
– Relocate duct termination (10+ feet from openings)
– Install makeup air system
– Seal ductwork leaks
– Upgrade ventilation system
Problem 5: Condensation in Ductwork
Possible causes:
– Duct runs through unconditioned space
– Temperature differential between exhaust and ambient
– Insufficient slope
Solutions:
– Insulate ductwork
– Slope duct toward exterior (prevents pooling)
– Use condensation trap at termination
– Route duct through conditioned space
Building Codes and Regulations
International Mechanical Code (IMC)
Key requirements:
– Range hoods must discharge to outdoors
– Minimum CFM based on appliance BTU
– Ductwork must be smooth-wall metal
– Makeup air required for high-CFM systems
– Termination clearances from windows and doors
Local Amendments
Check local codes for:
– Specific CFM requirements
– Duct material and sizing
– Termination location requirements
– Permit requirements
– Inspection requirements
Always:
– Check with local building department
– Obtain required permits
– Schedule inspections
– Use licensed contractors
Budget Breakdown: Ventilation Costs
Budget-Friendly ($400 – $1,000)
- Ductless range hood
- Basic ceiling fan
- DIY installation
Best for:
– Low-BTU grills
– Occasional cooking
– Open, uncovered areas
Mid-Range ($1,000 – $3,000)
- Ducted range hood (400-600 CFM)
- Basic ductwork
- Professional installation
- Ceiling fan for supplemental ventilation
Best for:
– Medium-BTU grills (30,000-50,000 BTU)
– Frequent cooking
– Covered outdoor kitchens
Premium ($3,000 – $8,000+)
- High-CFM range hood (600-1200 CFM)
- Pergola-integrated ventilation
- Complex ductwork
- Makeup air system
- Professional design and installation
Best for:
– High-BTU grills (50,000+ BTU)
– Multiple cooking appliances
– Enclosed outdoor kitchens
– Serious outdoor cooks
Frequently Asked Questions
Do I need a range hood for my outdoor kitchen?
It depends on:
– Type of cooking (high-heat grilling vs. low-heat warming)
– Location (covered vs. uncovered)
– Proximity to home (smoke intrusion risk)
– Local building codes
Recommendation:
– High-BTU grills (40,000+ BTU): Yes, ducted range hood required
– Medium-BTU grills (20,000-40,000 BTU): Yes, ducted or ductless hood recommended
– Low-BTU appliances (under 20,000 BTU): Optional, but recommended for covered areas
How much does outdoor kitchen ventilation cost?
Budget setup: $400 – $1,000
– Ductless hood
– DIY installation
Mid-range setup: $1,000 – $3,000
– Ducted hood (400-600 CFM)
– Professional installation
Premium setup: $3,000 – $8,000+
– High-CFM hood (600-1200 CFM)
– Pergola-integrated system
– Makeup air system
Can I vent my range hood into the attic?
No. Range hoods must vent to the outdoors. Venting into the attic causes:
– Moisture damage (mold, rot)
– Grease accumulation (fire hazard)
– Odor problems
– Code violations
How often should I clean my range hood filters?
Baffle filters:
– Clean monthly (or when grease buildup is visible)
– Wash in dishwasher or with degreaser
Mesh filters:
– Replace when damaged or heavily clogged
– Typically every 6-12 months
Charcoal filters (ductless hoods):
– Replace every 3-6 months
– More frequently with heavy use
What size range hood do I need?
Width:
– At least as wide as cooking surface
– Extend 3″ beyond each side of grill
CFM:
– Total BTU ÷ 100 = minimum CFM
– Example: 60,000 BTU grill → 600 CFM hood
Height:
– Mount 24″-30″ above cooking surface
– Check manufacturer specifications
Do I need a makeup air system?
Required when:
– Hood is 600+ CFM in enclosed space
– Hood is 400+ CFM in tightly sealed home
– Required by local building code
Symptoms of insufficient makeup air:
– Difficulty opening doors
– Backdrafting of water heaters or furnaces
– Reduced hood efficiency
– Whistling or draft noises
Can I install a range hood myself?
Ductless hoods: Yes, DIY-friendly (follow manufacturer instructions)
Ducted hoods: Professional installation recommended
– Requires ductwork installation
– Electrical connections
– Structural modifications (mounting)
– Building code compliance
Pergola-integrated systems: Professional installation required
– Custom design and fabrication
– Coordination between trades
– Structural considerations
Conclusion: Ventilation Is Essential
Proper ventilation transforms your outdoor kitchen from a smoky, uncomfortable space into an enjoyable cooking and entertaining area. Whether you choose a ducted range hood, pergola-integrated system, or supplemental ceiling fans, invest in ventilation that matches your cooking style and space requirements.
Key takeaways:
1. Range hoods are essential for high-BTU grills and covered spaces
2. Ducted systems are more effective than ductless
3. Size your hood correctly (width and CFM)
4. Plan ductwork carefully (short, straight runs)
5. Maintain your system regularly for optimal performance
Ready to design your outdoor kitchen ventilation? Explore the Cubox OKM Series Pergola with integrated ventilation for a complete, professional solution.
Request a free consultation to discuss ventilation design with our team.
Talk to Our Outdoor Kitchen Cabinet Team
Send Your Outdoor Kitchen Project Details
Use this area for cabinet layout questions, covered or modular direction, project coordination, and quote preparation.